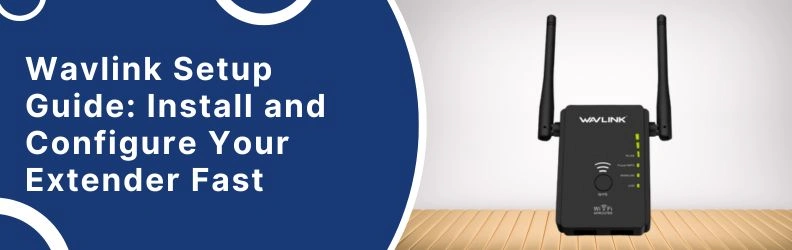
A stable Wi-Fi connection is essential in today’s connected environment, and when certain areas in your home or office fall into a dead zone, a range extender becomes a practical solution. The Wavlink range extender extends your network quickly and simply.
This article shows you how to install and configure your Wavlink extender step-by-step. WPS or browser-based extender setup instructions are given.
Take it out of the box. And begin to setup the device.
First things First
Open the package and check to see whether you have everything you need.
You should see:
- Wavlink range extender
- Power adapter (sometimes it’s already attached)
- Quick install guide
- An ethernet cable
Now plug it into a socket
Pick a spot somewhere halfway between your router and the area with weak WiFi. Not in the basement behind a water heater. Just somewhere open.
Once plugged in, wait for the LED lights to stabilize. It may blink for a bit. You’re not doing anything wrong—just give it a minute.
Two Setup Options
You’ve got two main ways to get through the Wavlink range extender setup. You can either:
1. Use the WPS Button (Easy, No Password Mess)
This is the “I-don’t-want-to-think” method. Works on most modern routers.
Here’s how:
- Hit the WPS button on your router
- Within two minutes, press the WPS button on the Wavlink extender
- Watch for the LED to go steady. That means it’s paired
- Once it’s stable, your extender is linked and ready
That’s it. No app, no setup page, no typing.
If your router doesn’t have WPS, don’t worry. You’ve still got the second option.
2. Use the Web Setup (Manual, but Straightforward)
This one’s still super doable—even if you’re not a tech whiz.
Step-by-step:
A. Connect to the Extender’s WiFi
Look at your phone/laptop’s WiFi settings. You’ll see something like:
Wavlink_N or WiFi_EXT — connect to that.
B. Open a Browser
Type this into the address bar:
http://wifi.wavlink.com
or sometimes:
192.168.10.1
This pulls up the Wavlink setup dashboard.
C. Login
Default username: admin
Default password: admin
(Unless you changed it before. If not, stick with the default.)
D. Follow the Prompts
You’ll now see a list of available WiFi networks. Choose your main WiFi (your router’s) and enter its password.
Once done, your extender will start syncing. It usually takes a minute or two. When the LED light goes solid—boom—it’s connected.
Placement Tips (Because That Matters More Than You Think)
Okay, now don’t just leave it plugged into a random hallway outlet and hope for the best. Here’s how to get the most out of your extender:
- Avoid placing it near thick walls or behind large furniture
- Stay away from microwaves or cordless phones (yup, those interfere)
- Ideal spot is midway between the dead zone and your router
- Test the speed using your phone. If it’s slow, move it a few feet
A few inches in either direction can sometimes make a big difference.
Common “Why the Heck Isn’t This Working?” Fixes
Sometimes tech just acts up for no reason. If your Wavlink setup isn’t going smooth, check these quick things:
1. LED Light Not Turning On?
Try another wall socket.
Still nothing? Long press the back pinhole reset button.
2. Can’t Reach Setup?
Connect to the extender’s WiFi.
Still stuck? Clear your browser cache or switch devices.
3. Forgot Admin Password?
Reset the extender.
Press the reset button for 10 seconds with a pin or paperclip.
FAQs
Is this configuration repeated if I relocate the extender?
Not really. You may disconnect and relocate it after configuration. Avoid moving it too far from your router.
My extender shows a strong signal, but the speed’s still slow—why?
Could be placement. Move it closer to the router. Also check if too many devices are hogging the bandwidth.
Can I use this extender with any router brand?
Yep. Wavlink extenders work with pretty much any WiFi router. Doesn’t matter if it’s Netgear, TP-Link, or your ISP’s box.
Do I need to do anything after a power cut?
Usually no. It’ll reconnect on its own. If not, unplug, wait 10 seconds, plug back in.
Quick Wrap-Up
Wavlink extender setup doesn’t have to be complicated. We usually plug, connect, and finish. After setting up WPS or manual login, you’ll notice fewer drops, better speed, and fewer WiFi anger moments.
Reset and try again if you hit a wall. Not you. WiFi may be tricky. That’s it. You’re good to go. Now go enjoy your buffer-free internet.